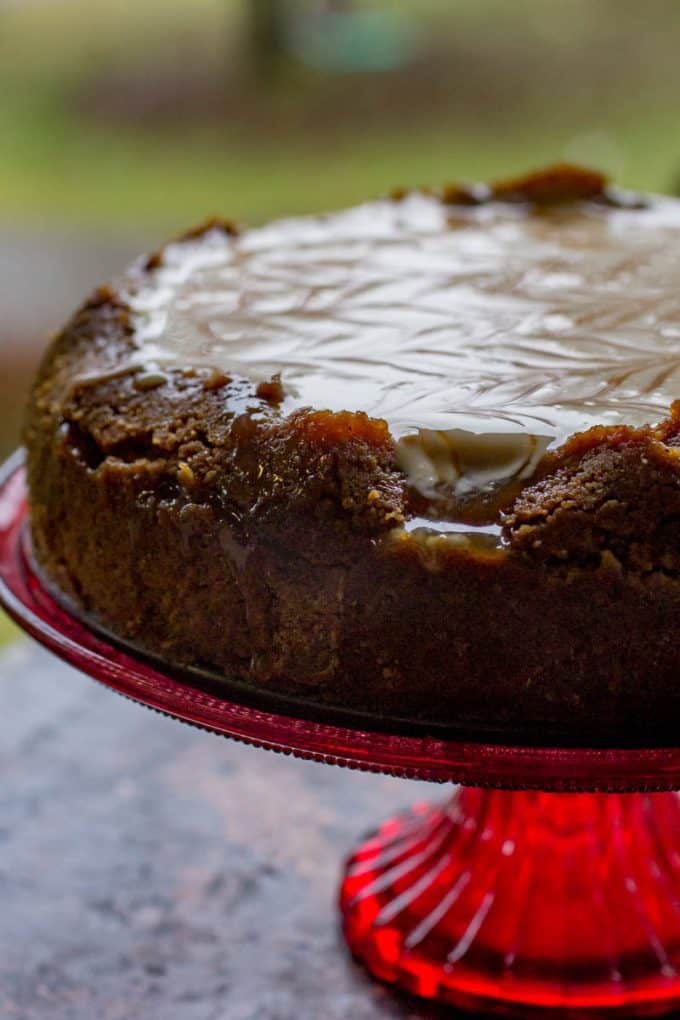
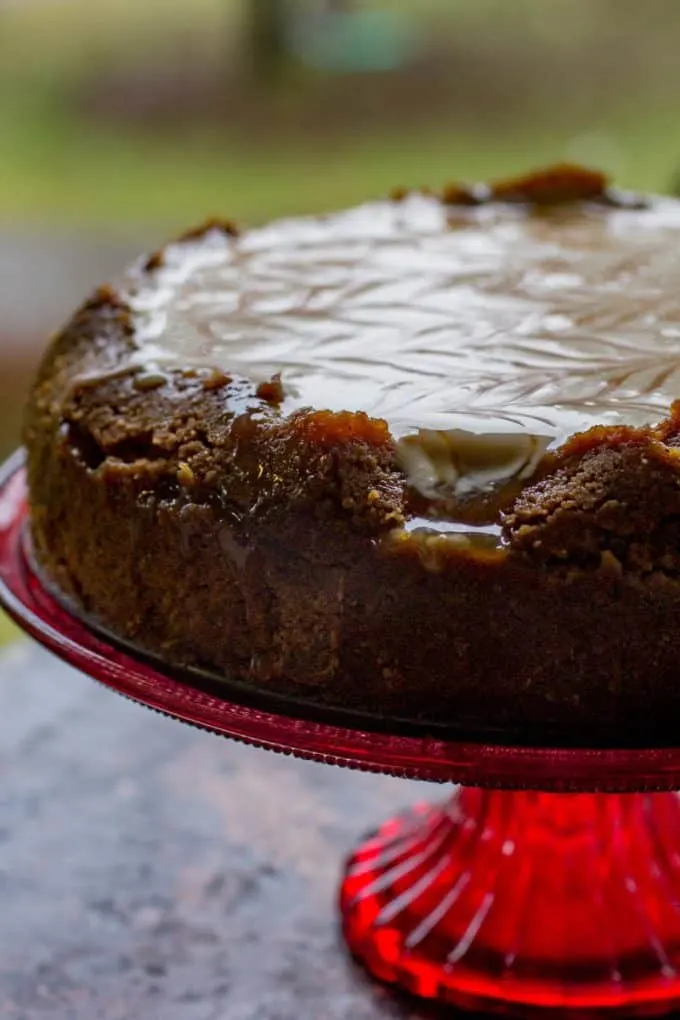
Our easy recipe for Instant Pot Eggnog Cheesecake is perfect for the holiday season! This features a sauce made with Salted Caramel Crown Royal, and has the perfect texture for cheesecake! We cannot get enough of it, and you’re going to love it too!

Instant Pot Eggnog Cheesecake
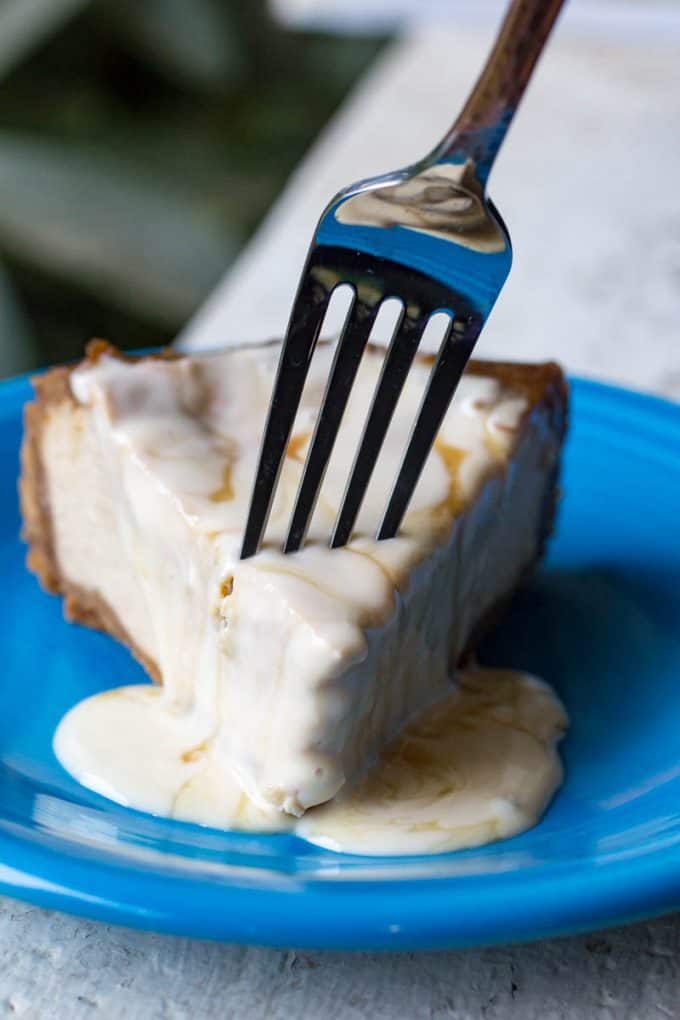
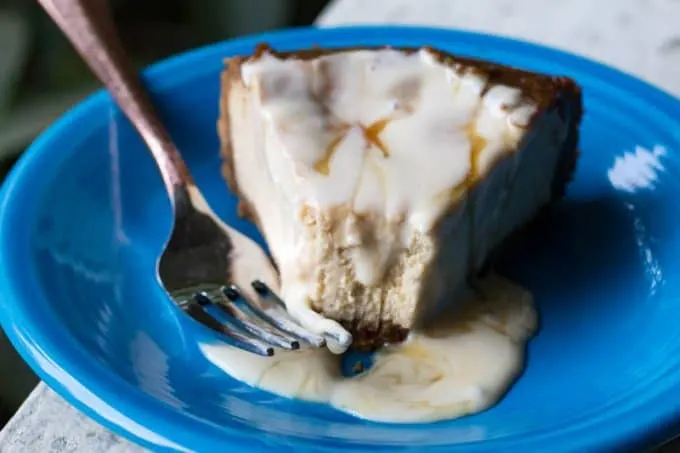
I loved ALLLLLL of the things about this cheesecake. It was my first Instant Pot cheesecake, and as a cheesecake fan, I was a little bit skeptical about pressure cooked cheesecake.
Spoiler alert – as usual, I was unnecessarily worried. It was awesome.
For this crust, I blind baked it because I prefer my crust to maintain a little crunch, and I’m really glad I did. It added another step to the process and a little extra time, but it was totally worth it for the end result.
Do you need something to serve before this awesome dessert? Try the Instant Pot Roast Beef Recipe I posted! If beef isn’t your thing right now, my Chicken and Dumpling Soup is sure to be a winter treat for your family.
Why you’ll love it!
- Seasonal flavors: The eggnog and caramel combination offers a festive holiday taste.
- Instant Pot convenience: No water bath needed, and you get a perfect cheesecake every time.
- Unique crust: The biscoff and graham cracker base adds texture and warmth.
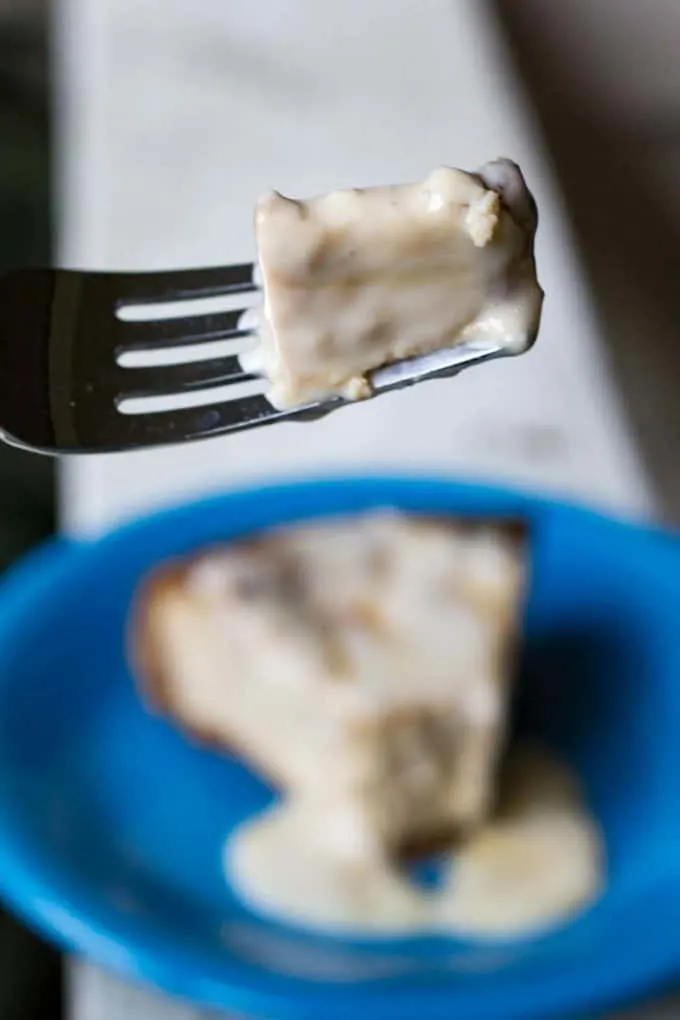
- Rich and creamy: The cheesecake itself is smooth, decadent, and full of flavor.
- Crowd pleaser: Perfect for gatherings, this cheesecake will impress any dessert lover.
Try our Traeger Eggnog Cheesecake too!
Instant Pot Eggnog Cheesecake shopping list
Wondering if you have to hit the store? Here’s the list of items you’ll need to make this recipe. For specific amounts, please refer to the printable recipe card at the bottom of the post.
- Biscoff Cookies
- Graham Cracker Crumbs
- All-Purpose Flour
- Dark Brown Sugar
- Salted Butter
- Cream Cheese
- Dark Brown Sugar
- Vanilla Extract
- Cinnamon
- Salted Caramel Crown Royal
- Eggnog
- Large Eggs
- Sour Cream
- Caramel Sauce
Have some Strawberry Cheesecake!

How to make Eggnog Cheesecake in the Instant Pot
This is just the overview so you can see what you’re actually getting into here. When you are cooking, you’ll want to use the full recipe at the bottom of the page.


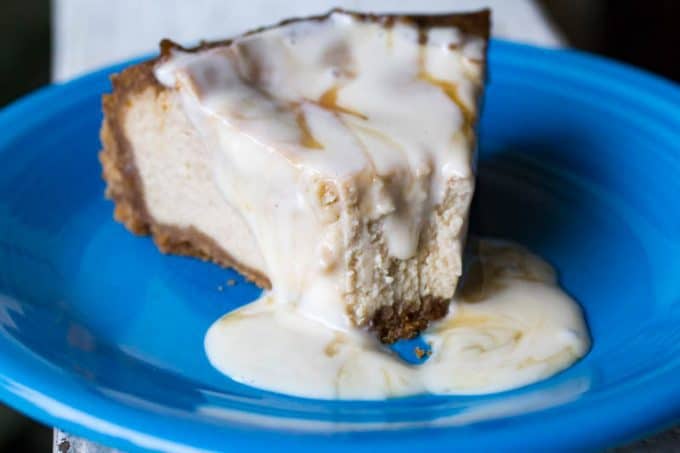
- Prepare the Crust: Combine crushed Biscoff cookies, graham cracker crumbs, flour, sugar, and butter. Press into a 7-inch springform pan and bake.
- Make the Filling: Mix softened cream cheese with brown sugar, then gently combine the remaining ingredients, including eggs and eggnog.
- Cook in Instant Pot: Pour 1 cup of water into the Instant Pot, lower the cheesecake in using the trivet, and cook on high pressure for 40 minutes. Allow a natural pressure release for 15 minutes.
- Chill the Cheesecake: Remove carefully, wipe off any moisture, and refrigerate overnight to set.
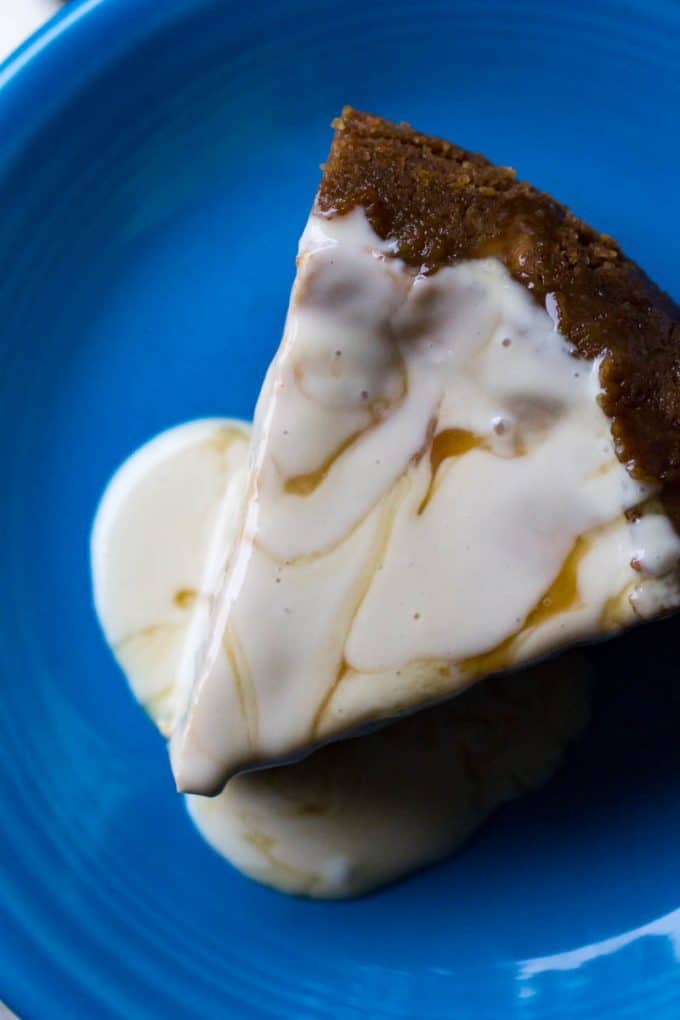
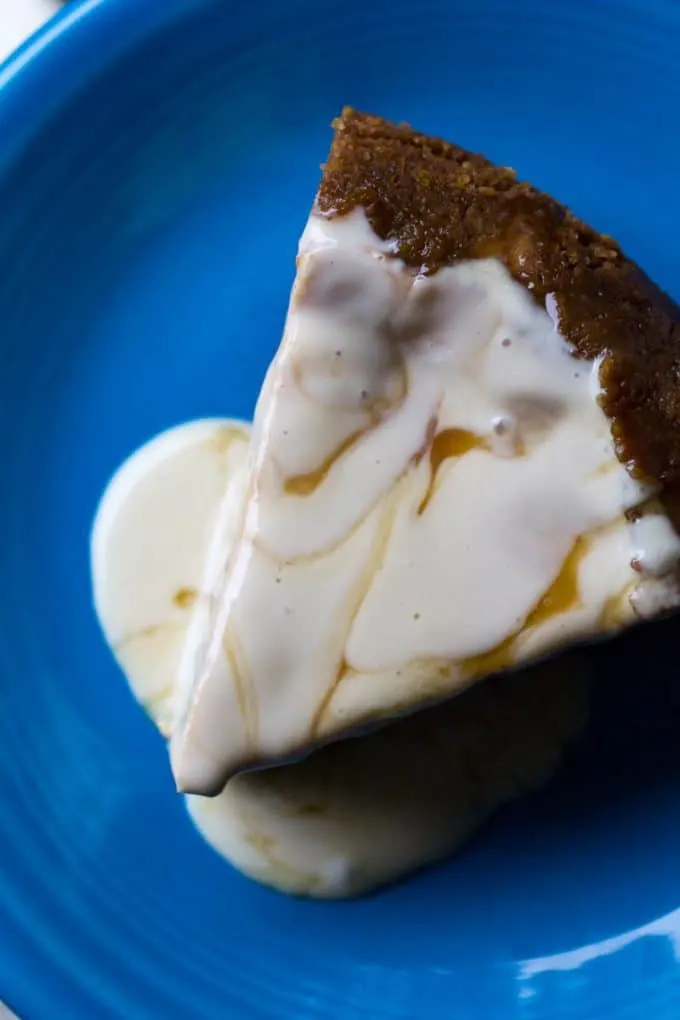
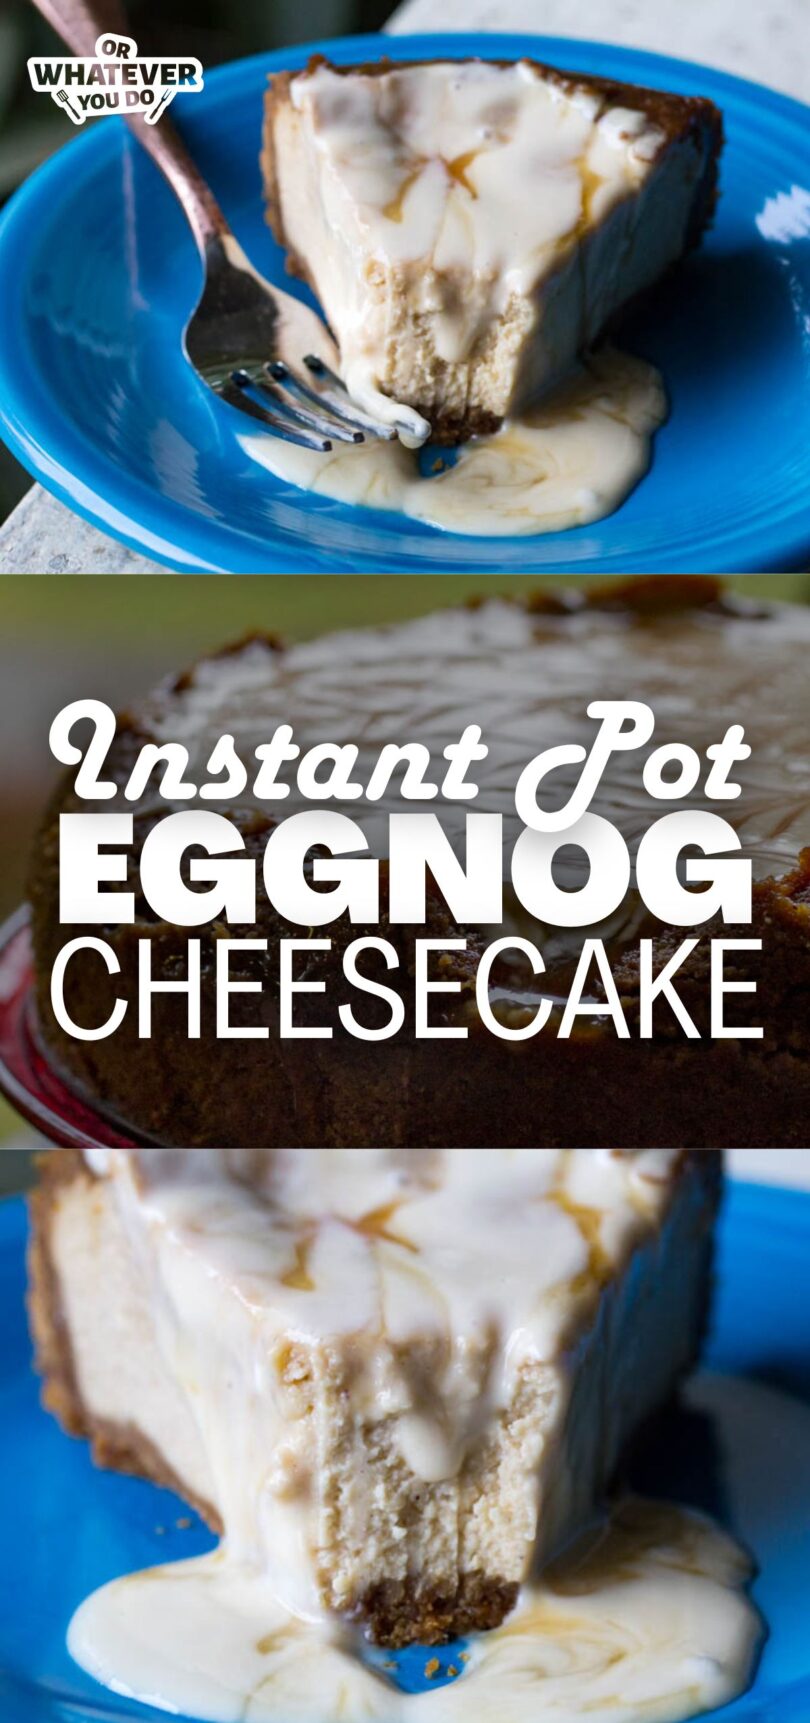
- Add the Topping: Combine sour cream, caramel sauce, and Crown Royal, and pour over the chilled cheesecake before serving.
Serve after some Braised Short Ribs!

FAQ
How do I store this cheesecake?
Store the cheesecake covered in the refrigerator for up to 4 days. Make sure it’s well-wrapped to prevent it from drying out.
Can I make this cheesecake ahead of time?
Yes, you can make the cheesecake up to 2 days in advance. Add the sauce right before serving to keep it fresh.
How do I reheat this cheesecake?
Cheesecake is best served cold, but if you prefer a slightly warm slice, microwave individual portions for 10-15 seconds. Avoid reheating the whole cheesecake.
What can I substitute for Salted Caramel Crown Royal?
You can substitute any caramel-flavored liqueur or even leave it out if you prefer a non-alcoholic version.
Can I use a different crust?
Yes, graham crackers or gingersnaps can replace the Biscoff cookies, depending on your flavor preference.
Homemade Chocolate Chip Cookies
Serve this with…
- Freshly brewed coffee
- Vanilla ice cream
- A cup of hot apple cider
No Bake Cherry Cheesecake Fluff Pie

Tips For Success
- Don’t over-mix the batter. Especially once the eggs are added.
- There will be some drippage from the lid. Just pat it off with a paper towel after you take it out of the pot. It dries off and even the crust doesn’t get soggy, in my experience.
- The top won’t be so perfectly smooth as it usually is using an oven method. Your mileage may vary. Don’t let that scare you the texture is worth it. (If you have tricks for perfectly smooth IP cheesecake, hit me up in the comments below!)
- Get the right springform pan. I use an 8 quart Instant Pot these days and this pan fits perfectly. I’ll be on the hunt for one slightly bigger to see if that’ll fit. I would suspect an 8-inch pan would fit in an 8 quart, and Google tells me it is so, but I haven’t tested myself yet so I can’t vouch for it! You can buy the 7 inch below by clicking the link.

Instant Pot Eggnog Cheesecake


This Instant Pot Eggnog Cheesecake was an instant hit in our house. With a touch of Crown Royal and all the eggnog flavor, you're going to love this festive treat.
Ingredients
Crust
- 10 Biscoff cookies, crushed into crumbs
- 1/4 cup graham cracker crumbs
- 2 tablespoons all-purpose flour
- 2 tablespoons dark brown sugar
- 5 tablespoons salted butter
Cheesecake
- 12 ounces cream cheese, softened
- 1/3 cup dark brown sugar
- 1 1/2 tablespoons all-purpose flour
- 1 teaspoon vanilla extract
- 1/2 teaspoon cinnamon
- 1 tablespoon Salted Caramel Crown Royal
- 1/2 cup eggnog
- 2 large eggs
- 1 large egg yolk
Sauce
- 1/2 cup sour cream
- 1/4 cup caramel sauce
- 1 tablespoon Salted Caramel Crown Royal
Instructions
Crust:
- Preheat oven to 350. Combine all of the crust ingredients, mix, and press into your 7-inch springform pan. Bake in preheated oven for 10-12 minutes. Remove from oven and set aside to cool.
Cheesecake:
- Using a mixer, beat together the cream cheese and brown sugar for 4-5 minutes until smooth and combined. Add the flour, vanilla, cinnamon, crown royal, and eggnog. Mix gently by hand until combined.
- Stir in the eggs gently, one at a time, until just combined and you can't see any more streaks of egg white.
- Carefully pour batter into the springform pan. Pour 1 cup of water into the bottom of your Instant Pot.
- Using the trivet with the handles that came with your pot, CAREFULLY lower the cheesecake into the pot.
- Close the lid and set on high pressure for 40 minutes. When the cook cycle is complete, let the pressure naturally release for 15 minutes. Vent the pressure the rest of the way with the vent valve, and open only when the pin has dropped and it is safe to do so.
- Carefully remove the cheesecake from the pot using the trivet handles, and if there is water on the top of the cake, carefully dab it off with a paper towel.
- Run a butter knife around the outside of the crust between the crust and the pan to separate.
- Place the cake in the fridge overnight.
Topping:
- Combine all of the sauce ingredients, and pour over cheesecake immediately before serving. Garnish with caramel drizzle.
Recommended Products
As an Amazon Associate and member of other affiliate programs, I earn from qualifying purchases.

Nutrition Information:
Yield:
6Serving Size:
1Amount Per Serving: Calories: 776Total Fat: 50gSaturated Fat: 25gTrans Fat: 1gUnsaturated Fat: 20gCholesterol: 230mgSodium: 577mgCarbohydrates: 74gFiber: 1gSugar: 51gProtein: 12g
Nutrition data provided here is only an estimate. If you are tracking these things for medical purposes please consult an outside, trusted source. Thanks!
Amber Faires
Wednesday 14th of November 2018
We have a 6 quart IP do I need to change the recipe at all? I wont be buying the CR since we dont really drink it, and dont want to buy it just for cheesecake but Im guessing this will taste yummy even w/o it! Thanks!
Nicole Johnson
Friday 16th of November 2018
You shouldn't need to change it. Are you using the same sized springform?
This should still be amazing even without the Crown Royal!